Ispirazione del Progetto
Inspired by the portrait of Eleanora de Toledo by artist Bronzino this partlet features gold soutache freshwater pearls, and linen voile.
Facendo il Progetto
The wonderful thing about designing your own partlet in this manner is that it can be made to fit the intended wearer regarding the measurements. The back can be laid out wider or more petite as need and the length of the end can be made longer or short. When determining the length it should also be considered that the ends the back and front of the partlet will not be seen as they should be tucked between the camicia and the vestito.
Making the Grid
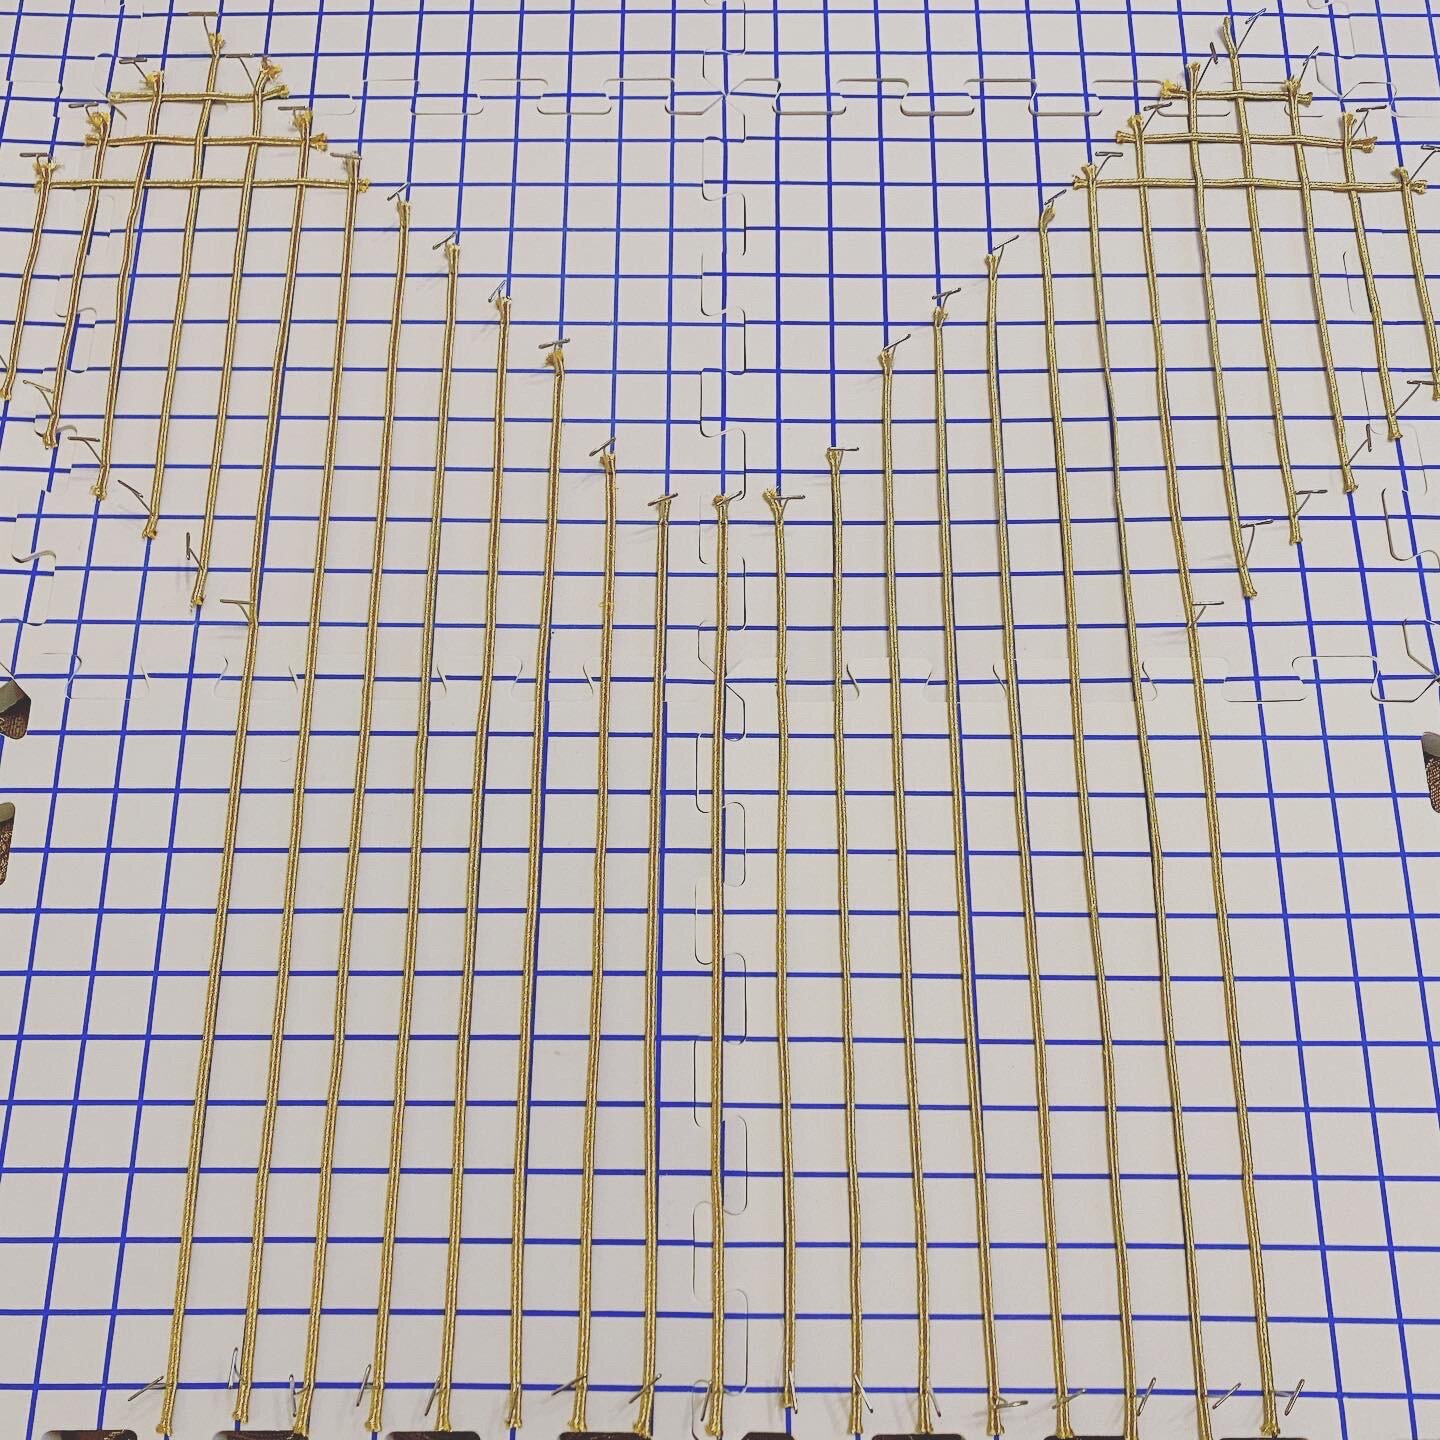
I used a matte board with 1 inch grid line to layout the partlet to ensure as even placement as possible. Starting with the vertical lines I first laid out the width of the back taking note of where the neck should end and how it would curve. Since the shape of the overall partlet is determined by the length of the individual columns of the soutache it was important to mark with T-pins. The columns from the back extend will down the front sides of the partlet until the full width of the back is achieved. Shorter column are then used to create the outside bottom edges of the front panels of the partlet. once you have the desired layout you can trim the edges. Take note to not trim too short as soutache tends to unravel and needs to be secured to the rows that will be entered next.
Starting the Rows
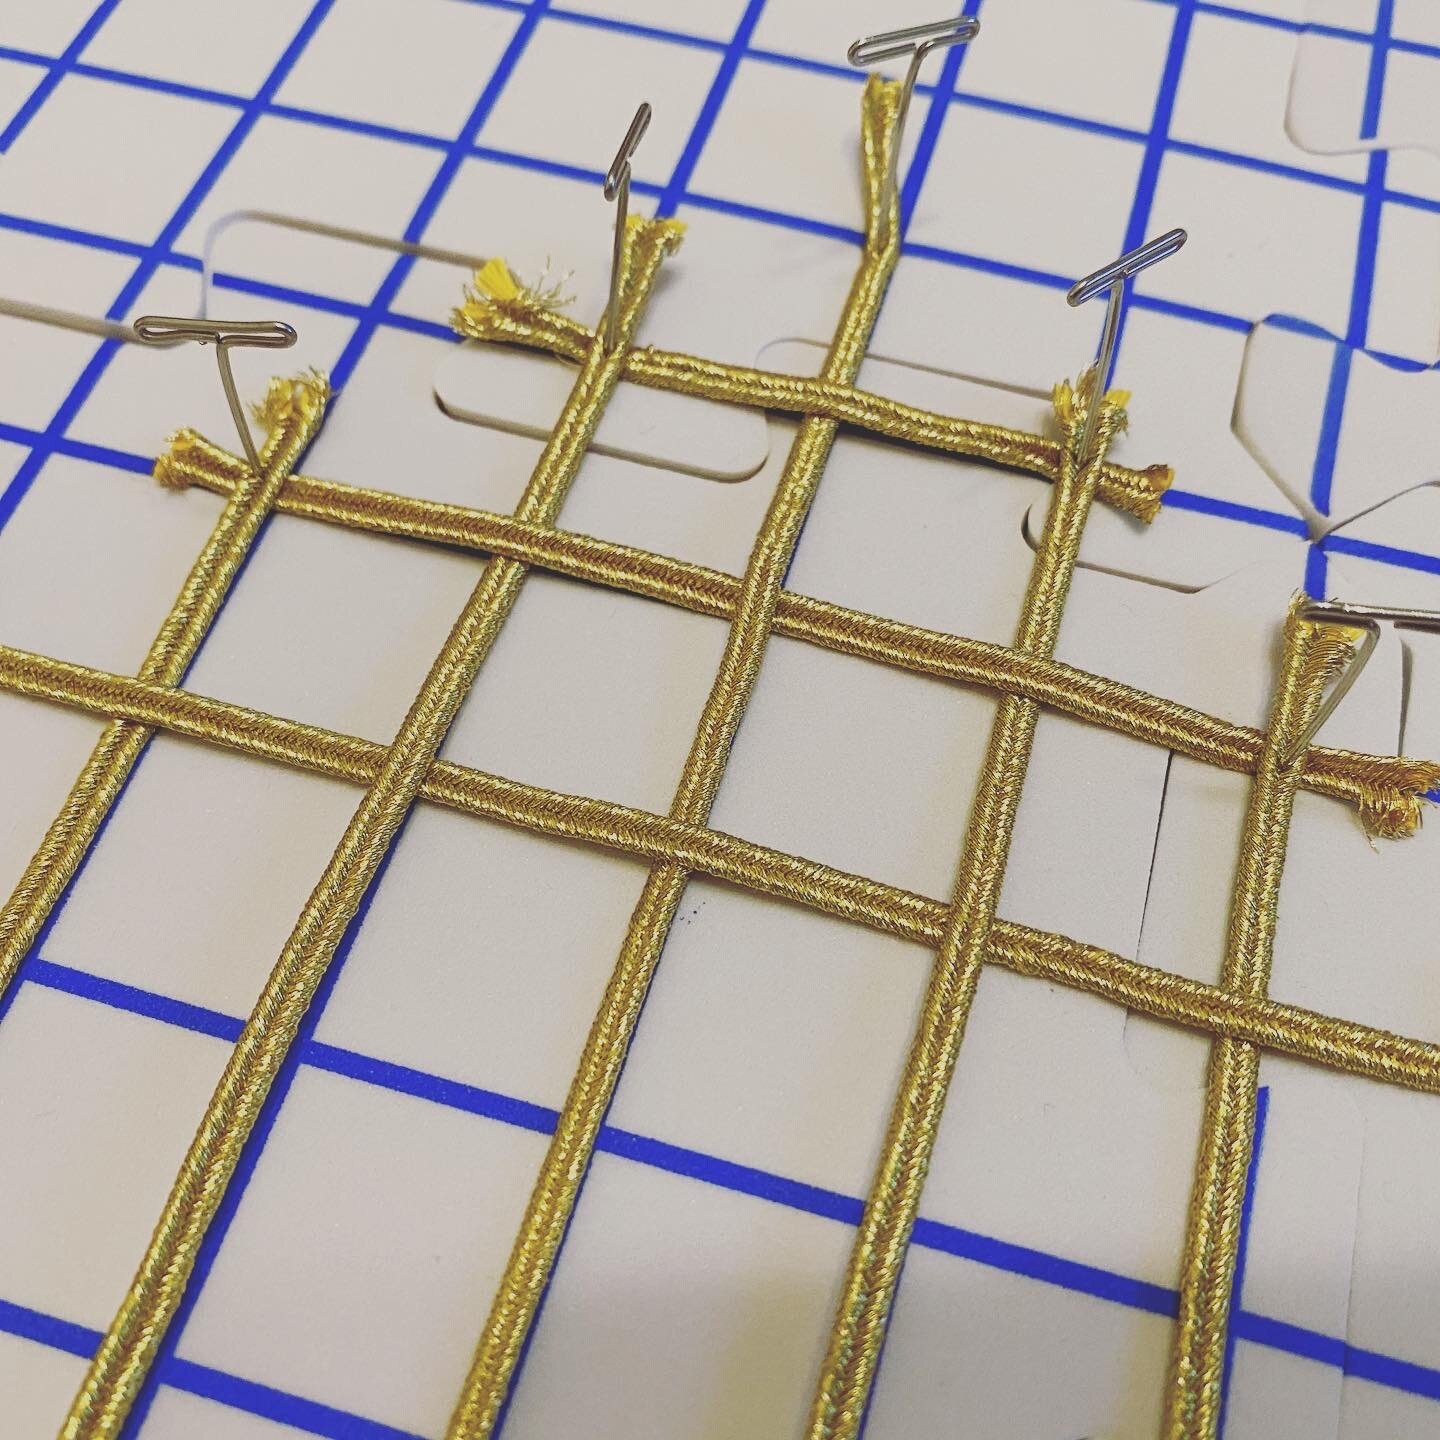
Starting front inside corner of the partlet you can begin to construct the grid weaving the the rows under the outside edge and the next column. Using the matte board grid as a guide, continue the pattern of the over-under weave always beginning UNDER the outside column and pinning the end of each row to the end of the column. This will naturally create a stronger weave that will provide the basic structure of the garment. Check your weave as you go to ensure that each adjacent row are not both on top or under a column. If you find two rows that are adjacent end up on the same side of the column you may have started the row over the column rather than under. Catching a row like this is easier to fix the earlier you catch it.
The Front Edges
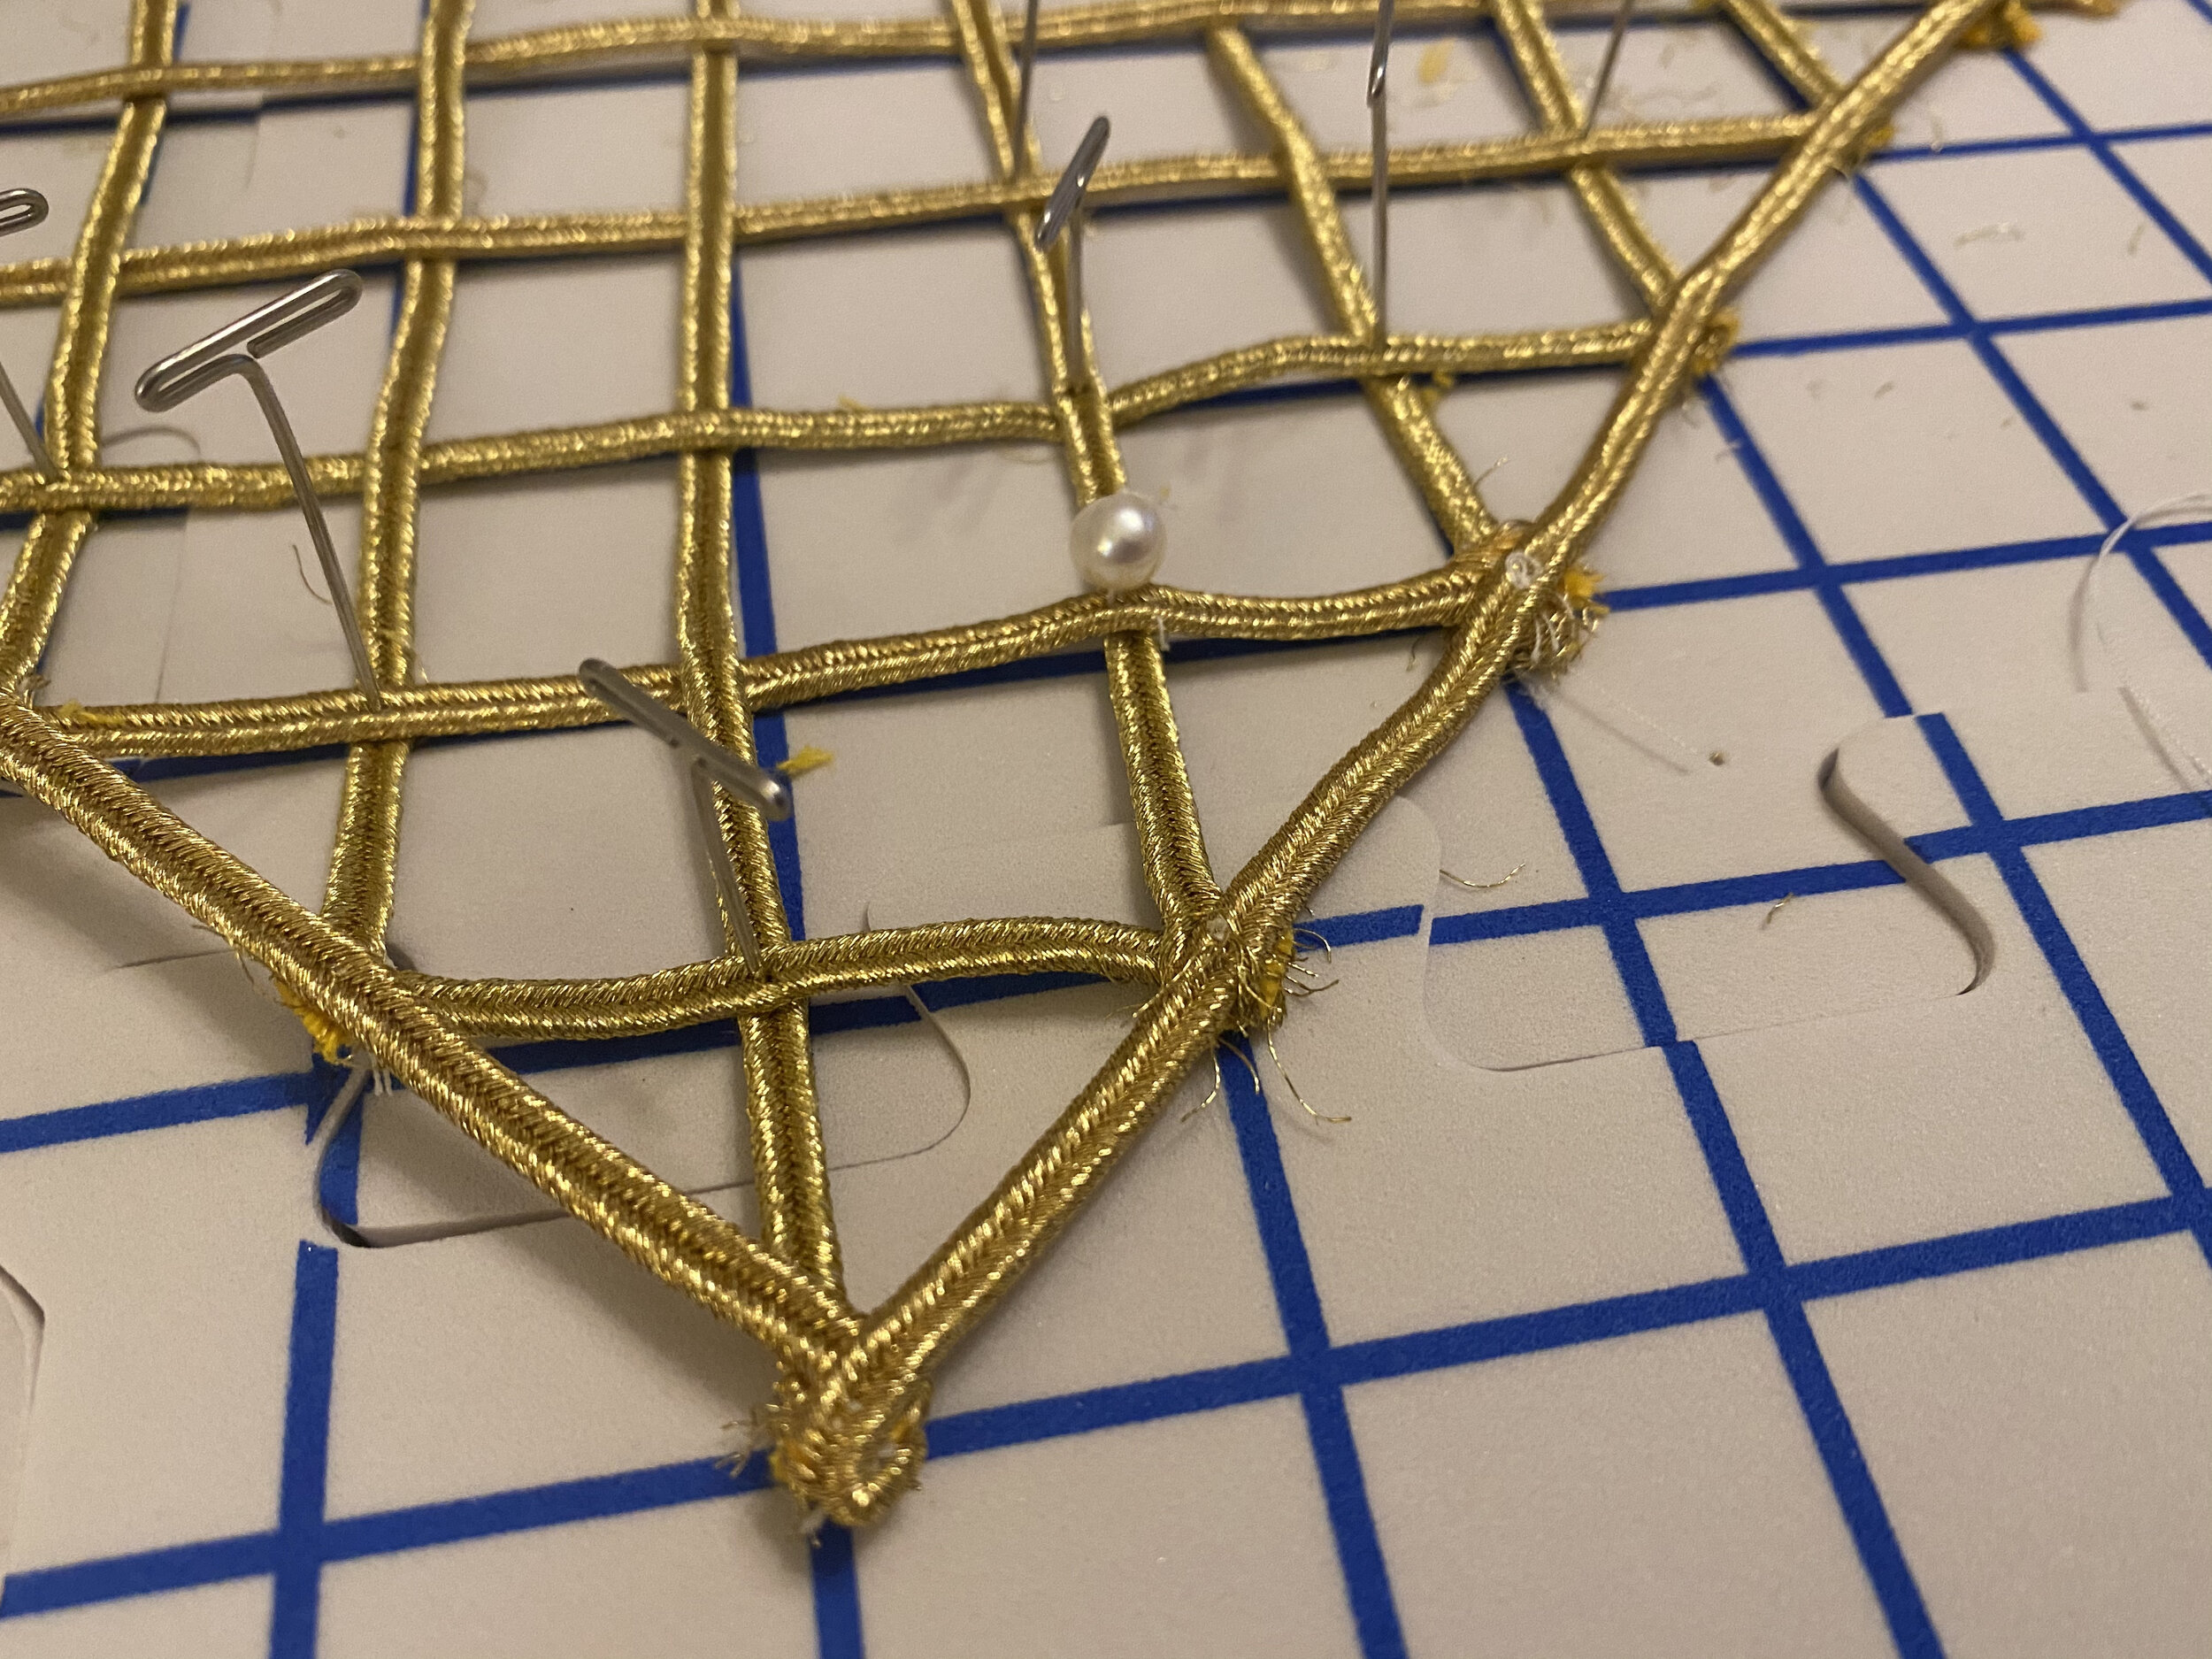
Once the layout of the columns and rows are woven and secured with pins you should see the clear shape of the final partlet. The bottom and the sides of the back are created naturally with the layout of the grids, however the front of the partlet line are created on a diagonal. To create the border for the front panels a separate piece of soutache.
Starting where the diagonal of the front panel meets the back at the shoulder line, and running along the edges of the front panels connecting the columns and rows on the diagonals. The soutache will follow the edges around the front panel, around the neckline, and around the edges of the other front panel, finally securing in the side back at the shoulder seam, matching the placement on the opposite side.
Securing the Weave and edges
Once all edges have been defined all junctures should be hand sewn together. As you remove pins, progressing along the edges, be sure to check for placement to ensure that the grid does not move too much as you secure the edges. The back and side-back will only secure at two point, however, the front of the partlet with the diagonal edges will need to be secured at three points. Be sure that all points are securely fastened before trimming any excess soutache from the edges.
Once the edges are secure the inside of the grid can hand sewn together starting on the front panels. Securing the grid before adding the pearls will give the final garment a stronger structure. Beading needles are generally smaller and might break trying to secure all together at one time.
The weave will shift as it is secured. Frequently checking the weave with the matte-board grid as the garment is sewn will help prevent the weave from shifting too much. When securing the weave, the row that that runs straight across the neckline and the column running down the back from the center of the neckline can be good guides as the grid shifts while securing.
Adding the pearls
Now that the weave and edges are secured the pearls can be attached. Most pearls will need to be attached with a thinner beading needle. The pearls should be placed onto the joins of the weave with the hole facing the sides, and not up and down. Secure the thread to the weave before threading the pearl. Secure the pearl with about three passes through the weave and the pearl.
Attaching to the Backing
When all pearls have been added to the weave the weave can be attached to the voile backing. The voile was measured to match the same grid layout as the weave with the addition of a small seam allowance. The seam allowance of the voile can be rolled and tucked under to create a rolled hem and whipstitched to close.
Materiali di Progetto
4mm Bullion Soutache in Gold - https://www.biasbespoke.com/alik-4mm-bullion-soutache-braid-in-four-colors.html
5 Cultured Freshwater (bleached) Pearl Strands, white, 7mm semi-round, B- grade, Mohs hardness 2-1/2 to 4. Sold per 15-1/2" to 16" strand - https://www.firemountaingems.com/itemdetails/h20j1875cl
Beadsmith English Beading Needles Size 10 & Size 12-4 Needles per Size - 8 Needles Total - https://www.amazon.com/gp/product/B07JGTL54H/


